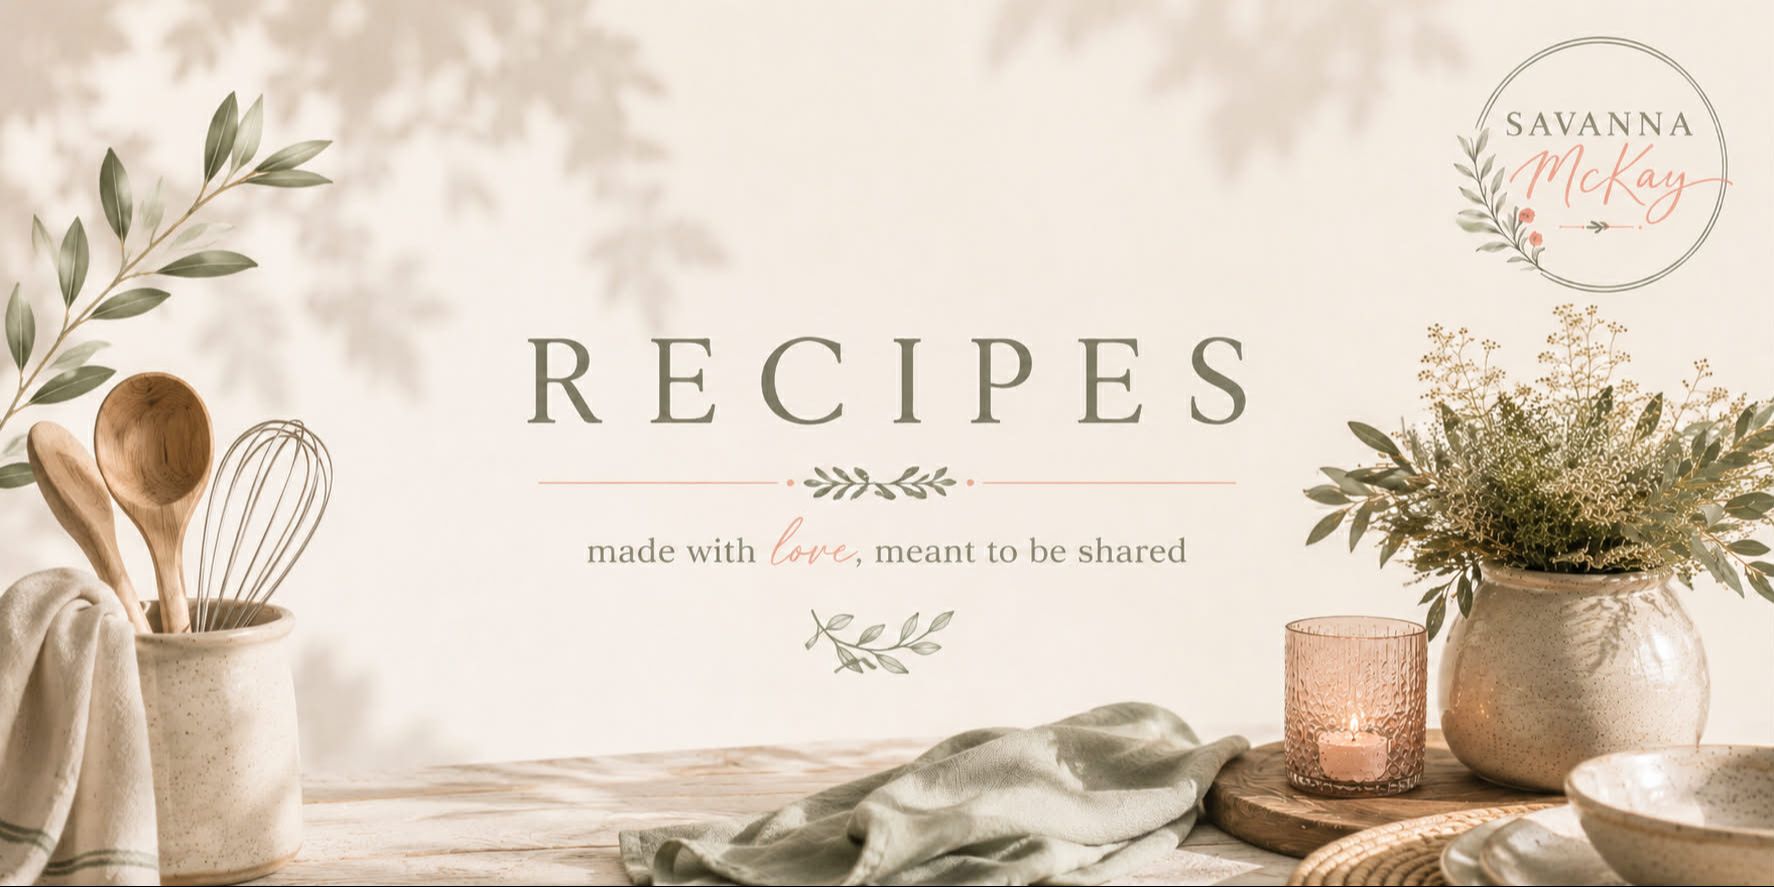
Maple Balsamic Apple Vinaigrette
This Maple Balsamic Apple Vinaigrette brings all the flavors of fall into one easy, healthy salad dressing. Using both balsamic and apple cider vinegar for depth, plus pure maple syrup for natural sweetness, it’s completely gluten-free, dairy-free, and made without refined sugar. The result is a silky-smooth vinaigrette that pairs perfectly with autumn salads, roasted squash, or grain bowls.
What you Need:
- 1.5 cups of Extra Virgin Olive Oil
- 1/2 cup of Balsamic Vinegar of Modena
- 1/4 cup of Apple Cider Vinegar
- 1/2 cup of Pure Maple Syrup
- 3 Tbsp of Honey Dijon Mustard
- Salt and Pepper to Taste
Suggested Cooking Tools
Recipe Instructions:
Mix Everything together and give it a good shake.
Serve over your choice of salad and Enjoy!
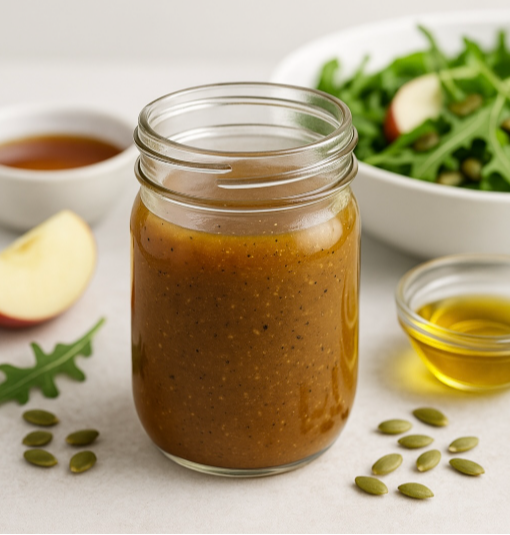
Kale Salad with Grilled Brown Sugar Chicken
This recipe is inspired by the. HelloFresh recipe Smoky Brown Sugar Chicken & Kale Salad . My version require at least 30 minutes of marinading time. I love this meal because its super simple but makes you look and feel like a professional. Everyone who tries this is always pleasantly surprised that they like it.
What you Need:
- 6 Chicken breasts
- 2 stalks of fresh Kale
- 1/4 Cup of Kinder's Hickory Brown Sugar Seasoning
- 6 Large Carrots
- 2 Apples of your Choice
- 1/2 cup of Craisins
- 1/4 cup of Sunflower Seeds
- 4 TBS of Extra Virgin Olive Oil
- Salt to taste
- Pepper
- Honey Mustard Dressing
Recipe Instructions:
- Dry off your chicken breasts and once dry put them in a bowl or a ziplock bag with 1/4 cup of Kinders Hickory Brown Sugar Seasoning and 2 TBS of Extra Virgin Olive Oil. Marinade in fridge for at least 30 minutes or up to 24 hours.
- Preheat oven to 450 degrees. Peel and slice carrots. Toss them in 1 TBS of oil and salt to taste. Lay them out onto a baking sheet in an even layer and bake on top rack for about 20 min, and stir them about halfway through
- While Carrots are cooking take chicken out of ziplock bag and put on the grill as is. Cook until internal temp reached 165 degrees
- Slice Apples
- Chop Kale removing the stem from all the stalks. Put kale in a bowl and add 1 TBS of oil and add salt to taste. Massage the salt and oil into the kale. This step is super important because the more you massage kale the sweeter the taste will be.
- Once Chicken and Carrots are cooked it is time to plate
- Distribute the kale evenly to all the plates, sprinkle the craisins over the kale, sprinkle the sunflower seeds over the kale, Add carrots to one side of salad, add the applees next to the carrots and add a whole chicken breast to to one side of the plate.
- Drizzle Honey Mustard dressing generously to each salad.
- Serve and Enjoy!
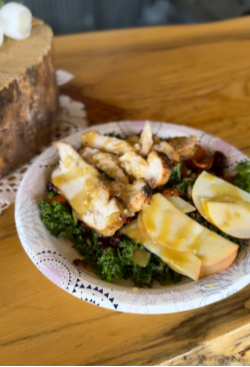
The Best Caramel Apple Recipe
Caramel apples make great holiday gifts for friends, family and neighbors. I have made these for a couple of years and I’m told that everyone looks forward to getting these every year. Fancy toppings are completely unnecessary because the cinnamon and sugar coating in this recipe is perfect.
Spoiler alert - the secret ingredient is Red Apples instead of Green!
Once you make these you will never want other caramel apples again. It’s super important that you read all the instructions before you start making these. Caramel can be super finicky and if you don’t follow the steps you won’t have success.
Caramel apples are actually really easy to make if you aren’t distracted and follow the instructions carefully! Let’s get started!
What you need:
- 8-11 Honeycrisp Apples
- Apple Cider Vinegar
- Baking Soda
- 1.5 cups of light Karo Syrup
- 2 sticks of butter
- 2 cups of white sugar
- 1 14 oz can of sweetened condensed milk
- Cinnamon
- Sugar
- white chocolate wafers
- milk chocolate wafers
- Popsicle sticks or something similar (for dipping)
- Candy Thermometer
Instructions:
- Wash the apples in an applecider/water/baking soda bath. I don’t typically measure these ingredients I just fill my sink with water, add the baking soda to the tops of the apples and add a few splashed of apple cider vingar so it bubbles.
- Dry apples and prepare apples with the sticks
- In a big pot add the white sugar and Karo Syrup. Bring to a boil and let boil until “clear”
- Turn down heat and add sliced butter so it melts quicker
- Once butter is melted add your sweetened condensed milk
- Stir until temperature hits 230-235. (Do not let it go over 235) You can leave your candy thermometer in the pot just make sure the tip isn’t touching the bottom of the pan because you want the thermometer to read the temp of the caramel not the temp of the bottom of the pan.
- Remove from heat once it reaches temperature and let caramel sit for a few minutes.
- Dip your apples and once dipped with caramel put them in the fridge until cold (at least an hour)
- Dip in white chocolate and before the chocolate hardens, sprinkle with cinnamon and sugar mixture
- Drizzle with milk chocolate.
- Keep refrigerated until ready to eat. These will stay good the fridge for a few weeks.ENJOY!!
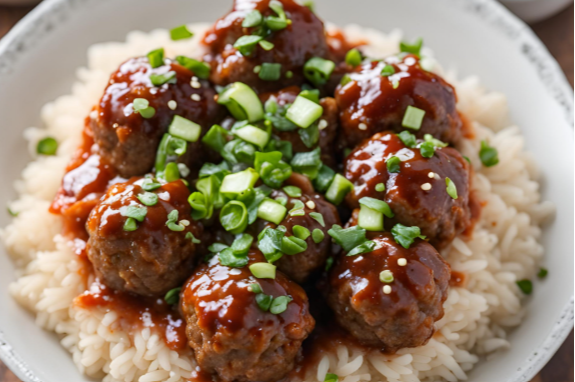
Easy Korean Style Meatballs
These Korea Style meatballs are a crowd please for adults and kids alike. You can Spice them up as much as you want but we tend to keep them mild for the children and lets be honest… mild for me as well!
Korean Style Meatball ingredients
- 1 lb Ground Beef
- 1/4 cup of Panko Bread Crumbs
- 2 tsp Sesame oil
- 1.5 tsp Salt
- 1 tsp Garlic Powder
- 1 tsp Onion Powder:
- 1 Tbs Hoison
- 2 Tbs Soy Sauce
- 1 tsp Rice Vinegar
- 4 tsp Brown Sugar
How to make Korean Style Meatballs
- Mix together ground beef and the rest of the ingredients in a bowl.
- Scoop between 20-25 bite size meatballs
- Place meatballs on a baking tray and bake @425 degrees for 10 minutes.
- Enjoy!
What to serve with Korean Style Meatballs
- Rice
- Broccoli
- Fried Rice
- Carrots
- Fresh Green Beans
Homemade Ranch Dressing
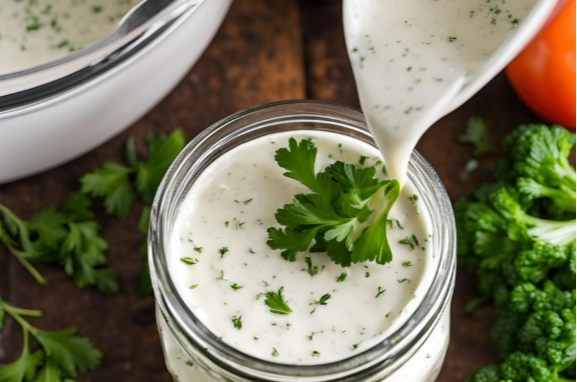
I have been a sauce girl my whole life. Most of the time I consider food the vehicle for sauce to get in my mouth. Good sauce makes all the difference in any recipe.
I started making my own Ranch Dressing several years ago and after several requests I’m finally sharing the recipe here! Homemade Ranch Dressing is so easy and doesn’t require a lot of ingredients. You can also keep it fresh in a mason jar or in a sauce squeeze bottle for up to two weeks!
What You Need:
- Mayonnaise: I prefer best foods Mayo for this recipe but you can use whatever brand you want.
- Whole Milk: Whole milk will give it the good texture. If you don’t have whole milk on hand you can do part milk of your choosing and part heavy cream
- Salt: Canned Green Chilis works great
- White Distilled Vinegar
- Garlic Powder
- Onion Powder
- Dried Parsley: You can also use fresh
- Sugar: If you like a ranch that is a little less sweet, add one less tsp of sugar
How to make Homemade Ranch Dressing
- Add all the ingredients to a blender
- Blend Until Smooth
- Enjoy!!
Spicy Cheese Stuffed Chicken
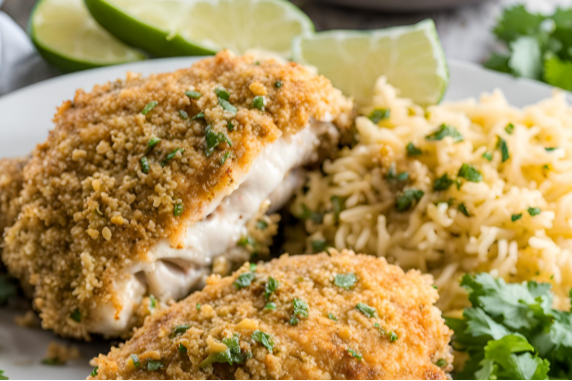
The Spicy Cream Cheese in this dish is everything!
What You Need:
- 2 Chicken Breasts: Butterfly two chicken breasts so you can stuff the chicken
- Cream Cheese: Do not cheap out on the ingredients. Trust me. It makes a difference to use name brand products like Philadelphia. It melts easier and tastes better.
- Green Chilis: Canned Green Chilis works great
- Colby Jack Cheese
- Taco Seasoning
- Panko Bread Crumbs: I prefer these to regular breadcrumbs because they crisp up so much better
- Parmesan/Romano cheese blend: My favorite brand is BelGioioso.
- Salt
- Melted Butter
How to make Spicy Cheese Stuffed Chicken
- Butterfly the chicken breasts with a good knife!
- Mix together cream cheese, green chilis, colby jack cheese, taco seasoning and once mixed stuff between your butterflied chicken breasts.
- In a separate bowl mix together the panko bread crumbs, salt and melted butter. Press on top of stuffed chicken breasts
- Bake Chicken at 400 degrees on a baking sheet for 25-35 min or until internal chicken temperature of chicken reaches 165 degrees.
What to serve with Spicy Cheese Stuffed Chicken
- Mexican street corn
- Mexican Rice
- Cilantro
- Limes
- Fresh Green Beans
Pina-Colada (Non Alcoholic)
I love this time of year because the weather is beautiful and gets me excited for the summer months. One of my favorite things about summer is sitting by the pool or at the beach with a fun drink in my hand. A few years ago we went to Mexico and had the best virgin pina coladas ever! Eric and I played with several recipes but never found one that measured up to the one we had in Mexico so we decided to create our own recipes and it is now one of our signature drinks we serve our guests.
Pina Colada Ingredients:
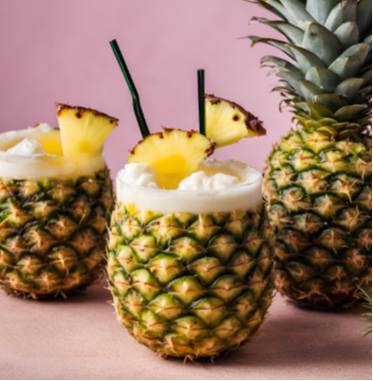
- 1/2 of a fresh pineapple or 16 oz of frozen pineapple: Frozen pineapple will give you more of a slushy/smoothie texture which we prefer. Typically we will core and slice the pineapple using this tool, freeze the pineapple and use the pineapple shell to serve the drinks in. We always have pineapple in our freezer if we do this way and fresh frozen pineapple is the best.
- 6oz Pineapple Juice: Can be from the fresh pineapple or canned pineapple juice works too
- 1/4 cup of Coconut Creamer: My favorite one to use is coffee mate coconut creamer or a Mexican brand called Calahua.
- 2 cups of Ice: You can use more or less depending on the texture you want
- Cinnamon: This is an optional ingredient but so good! We are a house divided on this one. Savanna loves the cinnamon but Eric does not. You can mix it in with the rest of the ingredients or add it as a garnish at the end.
How to make the Pina Colada
- Add all the ingredients in a blender
- Blend ingredients until smooth
- Pour in a cup or cored pineapple to serve.
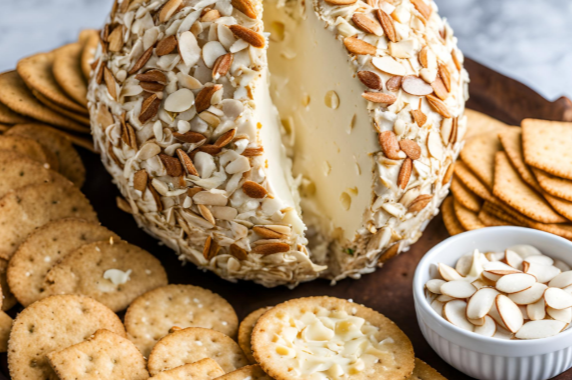
Pineapple Cheeseball
One thing you should know about me is that I love pineapple. This recipe is the perfect balance of sweet and savory. This cheese ball recipe has been in my family for as long as I can remember and it is always a hit at our holiday parties.
One of my friends told me that for Thanksgiving last year they bought a cheeseball from the store instead of making my recipe and all their kids kept saying was "We want Savanna's Cheese Ball." That is proof that this is also kid friendly!
Cheeseball Ingredients:
- 2 - 8oz packages of Cream Cheese: Do not cheap out on the cream cheese. Trust me. It makes a huge difference to use name brand products like Philadelphia. It just tastes way better.
- 1 can of crushed pineapple: If you are feeling zealous use fresh pineapple but for the convenience canned pineapple works good enough here.
- Seasoning Salt to Taste: Start with 1/2 tsp and gradually add more to taste if needed.
- 2 -4 Green Onions: Thinly slice the green onions and separate out the whites from the greens. You can save the whites to use for something else.
- Toasted Almonds: I usually just buy plain sliced almonds and toast them on my own. You can toast them in a pan on your stove or in your oven on broil. If you do it in your oven don't leave them alone. They toast really quickly and are easy to burn. For this reason I prefer to toast them on my stove.
How to make this holiday Cheese Ball with Pineapple
- Take cream cheese out of fridge and and place on counter to bring to room temperature for easier mixing.
- Toast the almonds and set aside to cool.
- Chop green onions
- Drain Pineapple Juice from can
- Mix together cream cheese, crushed pineapple, green pineapple and seasoning salt to taste starting with 1tsp
- Pull everything together in a ball with a rubber spatula and coat the ball with almonds
- Chill in the fridge for a couple of hours or overnight
- Serve with your choice of crackers.
Serving suggestions for Cheese Balls
- Ritz Crackers
- Club Crackers
- Naan Chips
- Wheat Thins
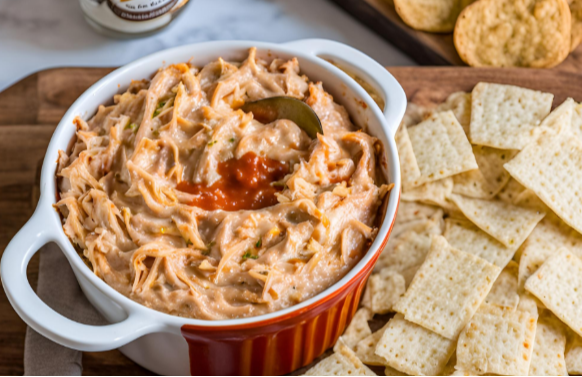
Sweet and Spicy Chicken Dip Made in a Crockpot
Sweet and Spicy is my go to flavor for almost any dish. The sweet perfectly balances the spicy heat and creates the most beautiful flavor profile!
This Sweet and Spicy chicken dip is a great appetizer for any occasion and is a crowd pleaser.
Ingredients:
- Cooked chicken breasts shredded: You can use rotisserie chicken or you can precook the chicken in an instant pot and shred it ahead of time.
- Cream Cheese: Do not cheap out on the ingredients. Trust me. It makes a difference to use name brand products like Philadelphia. It melts easier and tastes better.
- Buttermilk Ranch Dressing: You can use any type of ranch here but buttermilk ranch really is superior. I actually make my own ranch in "bulk" and keep it in my fridge so it is readily available as a dipping sauce or for recipes like this one. I will post the ranch recipe soon but in the meantime you can use whatever your favorite ranch dressing brand is. No ranch? No problem use our recipe!
- Brown Sugar: Did you know that brown sugar is just white sugar mixed with molasses?
- Franks Hot Sauce: Franks is the best of the best host sauce. It has such a good heat level to it.
- Shredded Cheddar Cheese: Since this dish has brown sugar in it and cream cheese I prefer a sharp cheddar but you can use your favorite cheddar flavor. Cheddar cheese comes in mild, sharp or extra sharp.
How to make Sweet and Spicy Chicken Dip
- Combine cooked chicken, cream cheese, ranch dressing, brown sugar, Franks Hot sauce and cheddar cheese in the crockpot and stir together
- Place lid on crockpot and set to low heat for 3-4 hours or high heat for 1-2 hours stirring every 30 minutes. Dip is ready when there are no more chunks of cream cheese and cheddar cheese is fully melted.
- Serve with your favorite dip accompaniments
What to serve with Sweet and Spicy Chicken Dip
- Tortilla Chips
- Celery
- Wavy Chips
- Carrot Sticks
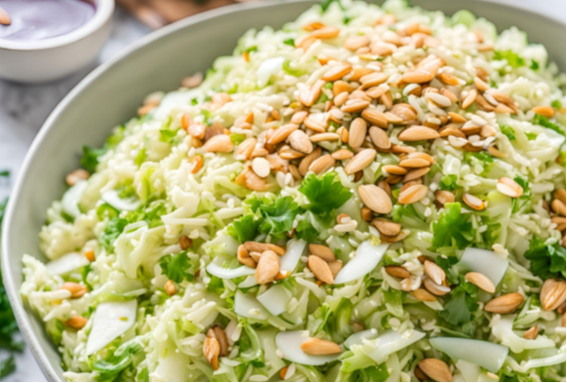
Cabbage Salad with Ramen Noodles
This recipe has been in my family for as long as I can remember and I have made a few tweaks to it over the years. It's my favorite salad, and it changed my mind about salads in general. When I was a lot younger I used to have an aversion to salads but Now, I actually enjoy having salads as a side dish, if you can even call this recipe a salad! It definitely isn't healthy for you, but it is oh so delicious!
Cabbage Salad with Ramen Noodle ingredients:
- 1/2 head of Green Cabbage: get a fresh head of lettuce not the pre chopped stuff. Cabbage will stay in your refrigerator for a week or more. I would suggest making this at the beginning of the week and again at the end of the week.
- 2-4 Green Onions: Chop the green part of the onions and save the whites for something else.
- Dry Ramen Chicken Flavor: I prefer the Maruchan brand because it has the best seasoning flavors for this recipe.
- Sesame Seeds
- Sliced Almonds: I buy almonds already sliced because it just makes sense. It doesn’t cost that much more to get them pre sliced and it will save you so much time!
- Sugar: Granulated white sugar works perfect
- Toasted sesame oil: Don’t skip this. Adding the sesame oil gives it a complex flavor that wants you going back for seconds.
- Oil: I typically use an olive oil or avocado oil
- Pepper
- Salt
- Chicken Ramen Seasoning Packet: Just use the one from the packet of ramen you are going to open for the salad
How to make the Cabbage Salad with Ramen Noodles and Dressing
Toast Almonds and Sesame seeds together either on the stove or in the oven on a low broil, but don’t walk away because they will toast super quick in the oven and they are easy to burn. Once toasted, set aside to cool .
- Chop up 1/2 head of cabbage and Green onions setting aside the whites to use at a later time in a different recipe. Crush up Dry Ramen noodles and add all salad ingredients to a bowl.
- Make the dressing by combining all the dressing ingredients and mix together. Add to salad 30 minutes prior to serving for maximum flavors
- Enjoy!
We'd love to keep in touch!
If you'd like updates on our latest events and blog articles, share your email below.
While you're here, let us know your city and state so we can send you invitations and updates that are most relevant to your area, along with online events you can join from anywhere.